Schedule Model
During Setup
Before consumers can participate, confirm:- Products and variants are attached
- Access paths and audience eligibility are configured
- Distribution timing is set
- Checkout or completion handling is ready if the experience sells products
- Preview and test flows work with the intended consumer states
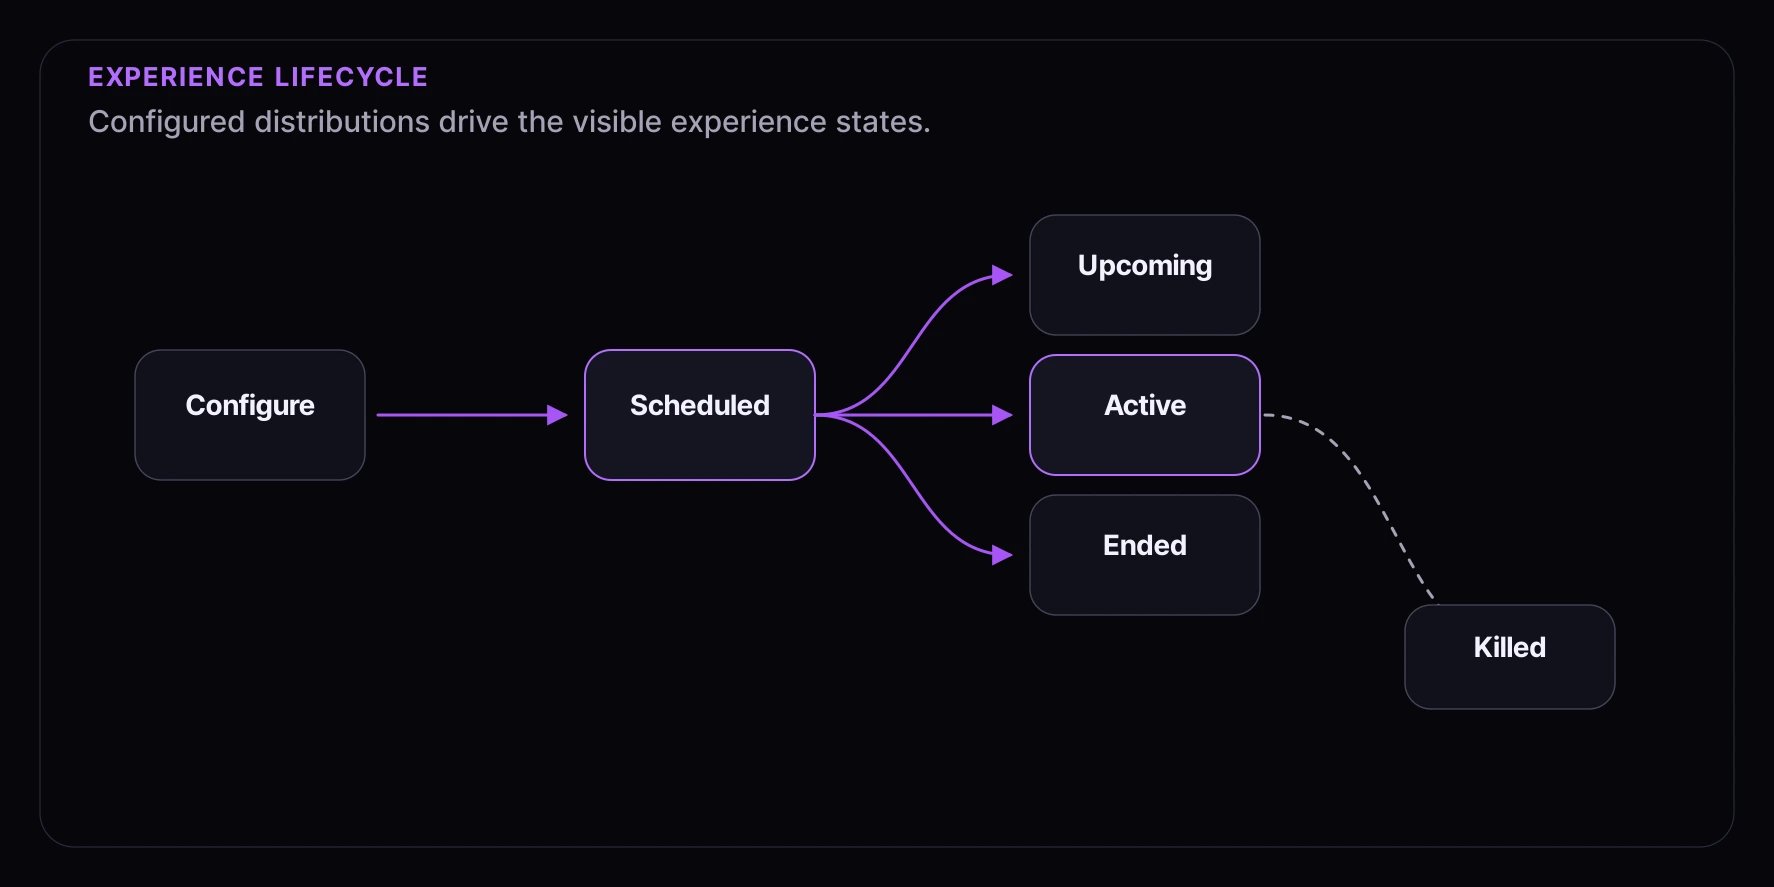
Distribution Timing States
| State | Meaning | Consumer experience |
|---|---|---|
| upcoming | The distribution has not opened yet | Consumers may see launch timing or waiting UI |
| active | Consumers can take the supported action | Consumers can enter, bid, book, or claim depending on type |
| ended | The distribution window has closed | Consumers see outcome or closed-state messaging |
| killed | The distribution has been manually stopped | Consumers should see that participation is unavailable |
Access Paths
Sequences define ordered access paths inside an experience. Higher numeric priority is evaluated first. Audiences and access codes decide whether a consumer is eligible for a path; they do not define ordering by themselves. Common patterns:- VIP early access with a high-priority sequence
- Access-code presale followed by general access
- Main access path followed by a lower-priority fallback
Monitoring
During an active experience, watch:- Entrants, admits, winners, bookings, or bids for the active distribution type
- Inventory and variant availability when products are involved
- Checkout completion and order sync if consumers purchase after admission
- Consumer support signals such as expired access, unavailable products, or failed payment attempts
Troubleshooting
Experience Opens At The Wrong Time
Check the distribution schedule and timezone. Experience timing is derived from child distributions.Consumers Do Not Reach The Expected Path
Check sequence priority, audience membership, and access-code requirements. If multiple paths can match, the higher-priority eligible sequence is used first.Product Availability Looks Wrong
Check variant inventory policy, variant quantity, and product allocation settings. Experience capacity and product inventory are related but separate concepts.Consumers Cannot Complete Checkout
Check admission validity, product/variant availability, payment provider state, and order completion sync.Related Guides
- Experiences Overview - Manage experiences
- Create Experience - Build a new experience
- Audiences - Configure eligibility
- Products - Understand products and variants