

Before you start
- Email: Save a business postal address under Settings → Email Sender (required before scheduling any email announcement). See Sender identity and sending domain.
- SMS: Connect your Twilio number under Settings → Integrations (Growth plan and above).
- Social posts: Connect at least one Instagram, Facebook, Discord, or Telegram account under Settings → Integrations (Growth plan and above). See Integrations for both SMS and social setup.
Find and track your announcements
Go to Experiences, open your experience, and select Marketing Hub in the sidebar. (The experience’s Overview page also shows a quick read-only preview with a Schedule button.) Announcements are grouped by status:
A Draft badge means the announcement is saved, but its send time can’t be calculated yet because the event it’s anchored to doesn’t have a scheduled time yet.
You can also view and schedule sequence-specific emails and texts on a sequence’s Announcements tab (social posts are always scheduled at the experience level).
The Marketing Hub also shows each sequence’s automatic audience invite, while automatic waitlist notifications appear on the experience Overview. See Invites, waitlist and access-code sends for how those work.
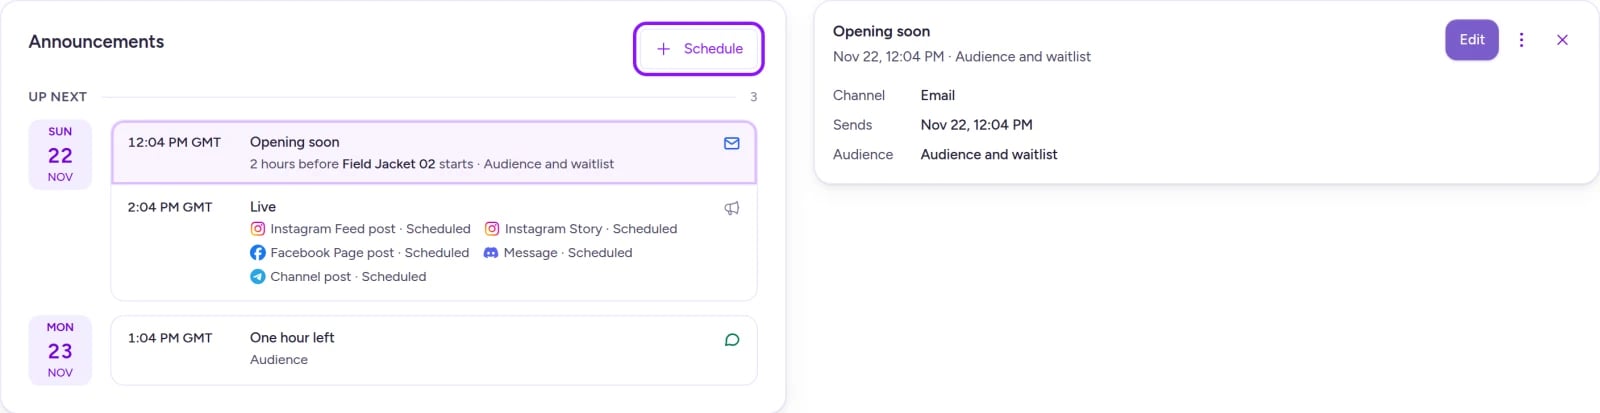
Review all scheduled emails, texts, and social posts in the experience's Marketing Hub.
Schedule an email
1
Choose Email
In the Marketing Hub, select Schedule to open New announcement, choose Email, and select Next.
Social posts require the Growth plan or above. If you downgrade after scheduling texts or social posts, existing scheduled sends still go out while your accounts remain connected, though creating new social posts (or scheduling copies after Cancel and copy) requires Growth.
If you haven’t saved a postal address yet, you can still draft your email, but Create won’t unlock on Review until you select Add your postal address to save one in Settings → Email Sender (the preview shows a placeholder address until then).
2
Write your message
On the Content step, pick a layout and fill in the fields while watching the live preview update:
- Simple: Headline and Body.
- Big CTA: Adds a button with Button label and Button link.
- Image-led: Adds an Image (with required alt text) plus a button.
3
Set the timing and recipients
On the Schedule step, choose When to send:
- A specific date and time in your chosen time zone.
- Relative to an event: Under Anchor to, pick The experience or A distribution, then choose the trigger moment (such as Experience starts or Distribution opens) and how many minutes, hours, or days before or after.
- Audience reaches members of the experience’s gated sequence audiences—whether or not they’ve entered yet (or just that sequence’s audience if scheduled from a sequence’s Announcements tab). If no sequence has an audience attached, no one matches.
- Waitlist reaches everyone on the waitlist.
4
Review, test, and schedule
Inspect your email across Inbox, Desktop, and Mobile previews on the Review step. Optionally send yourself a test, then select Create. Your announcement moves to Up next.
Schedule settings reference
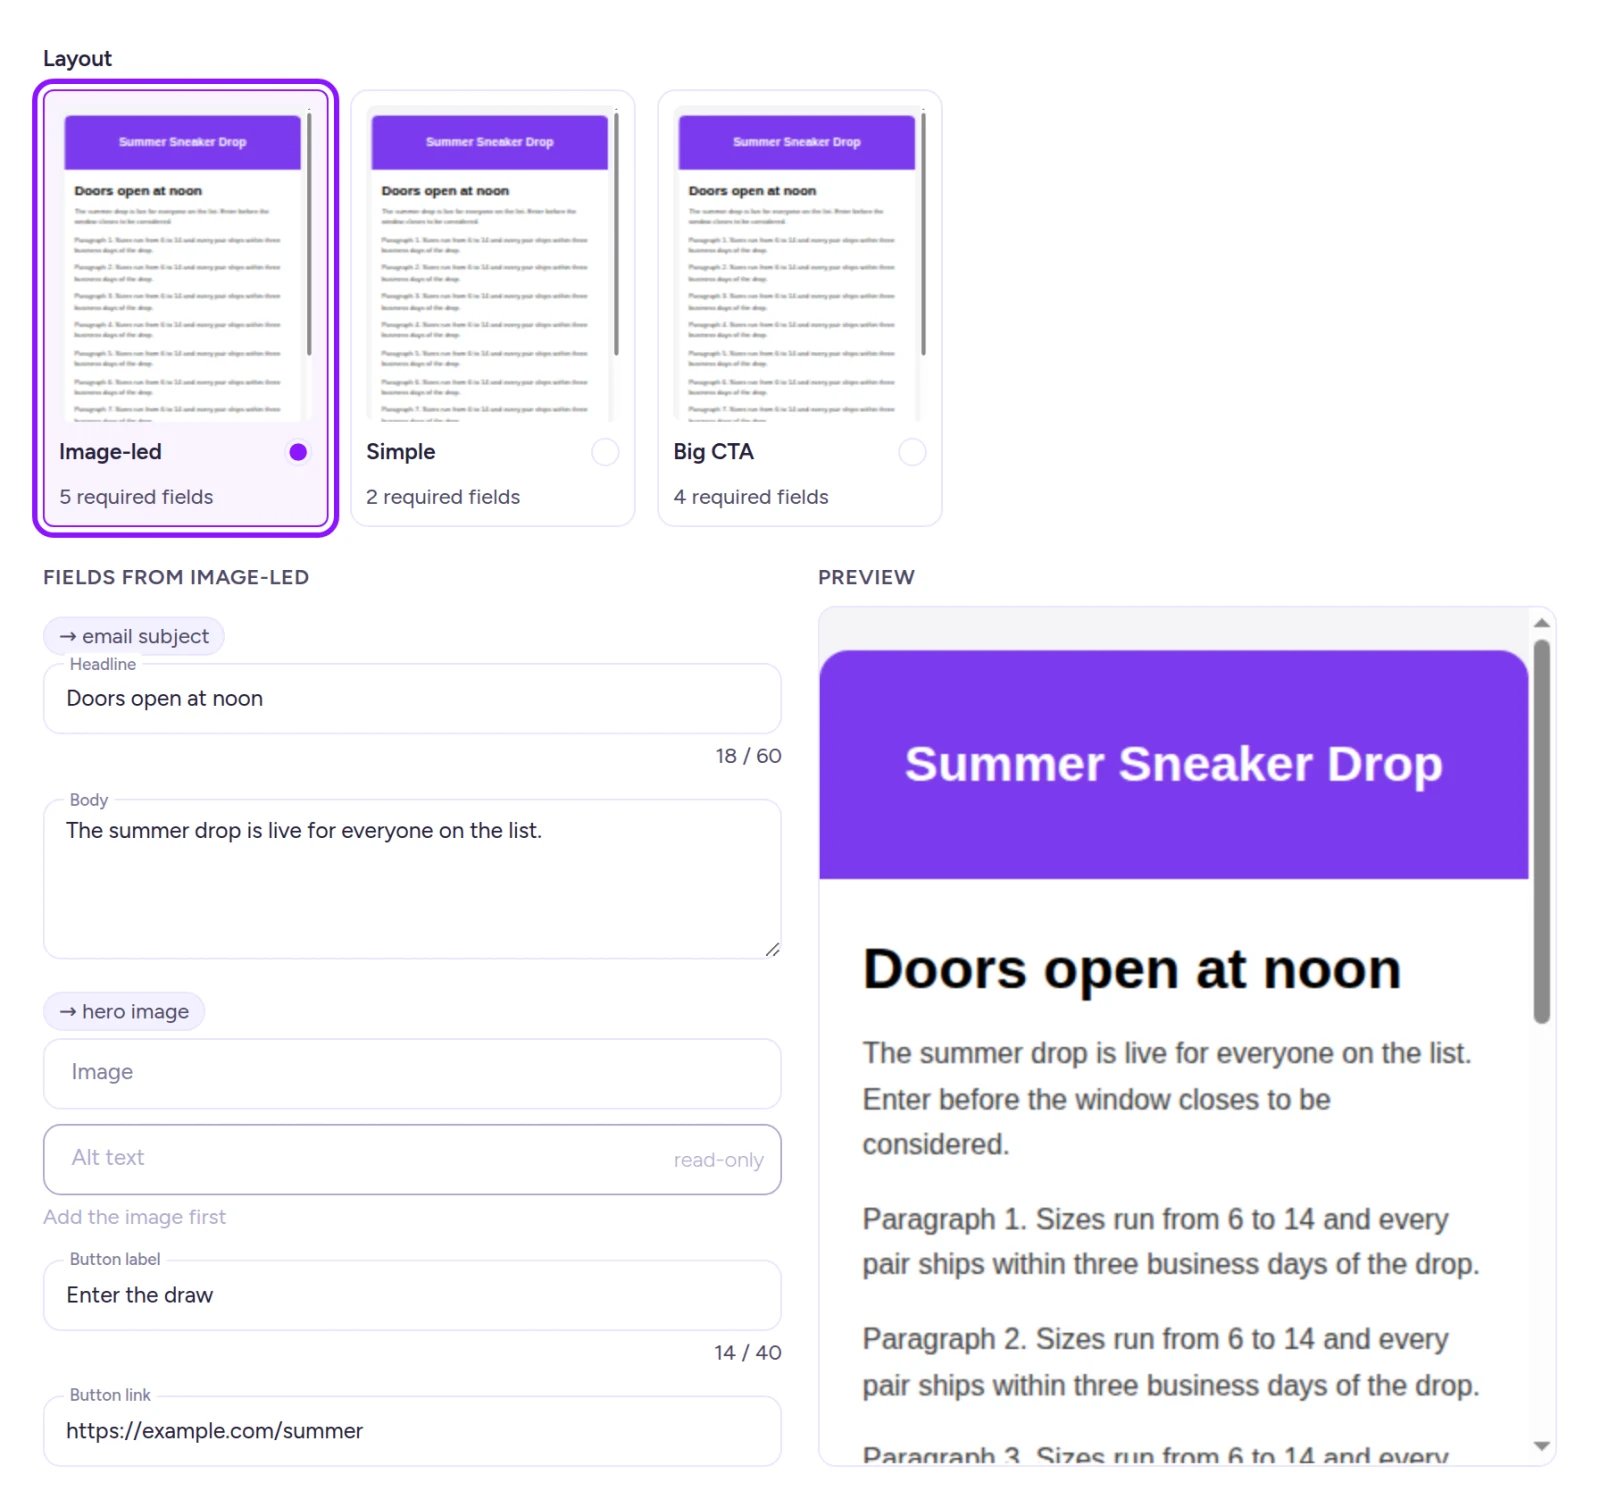
Choose a layout and preview your email live—the Headline becomes the email subject line.
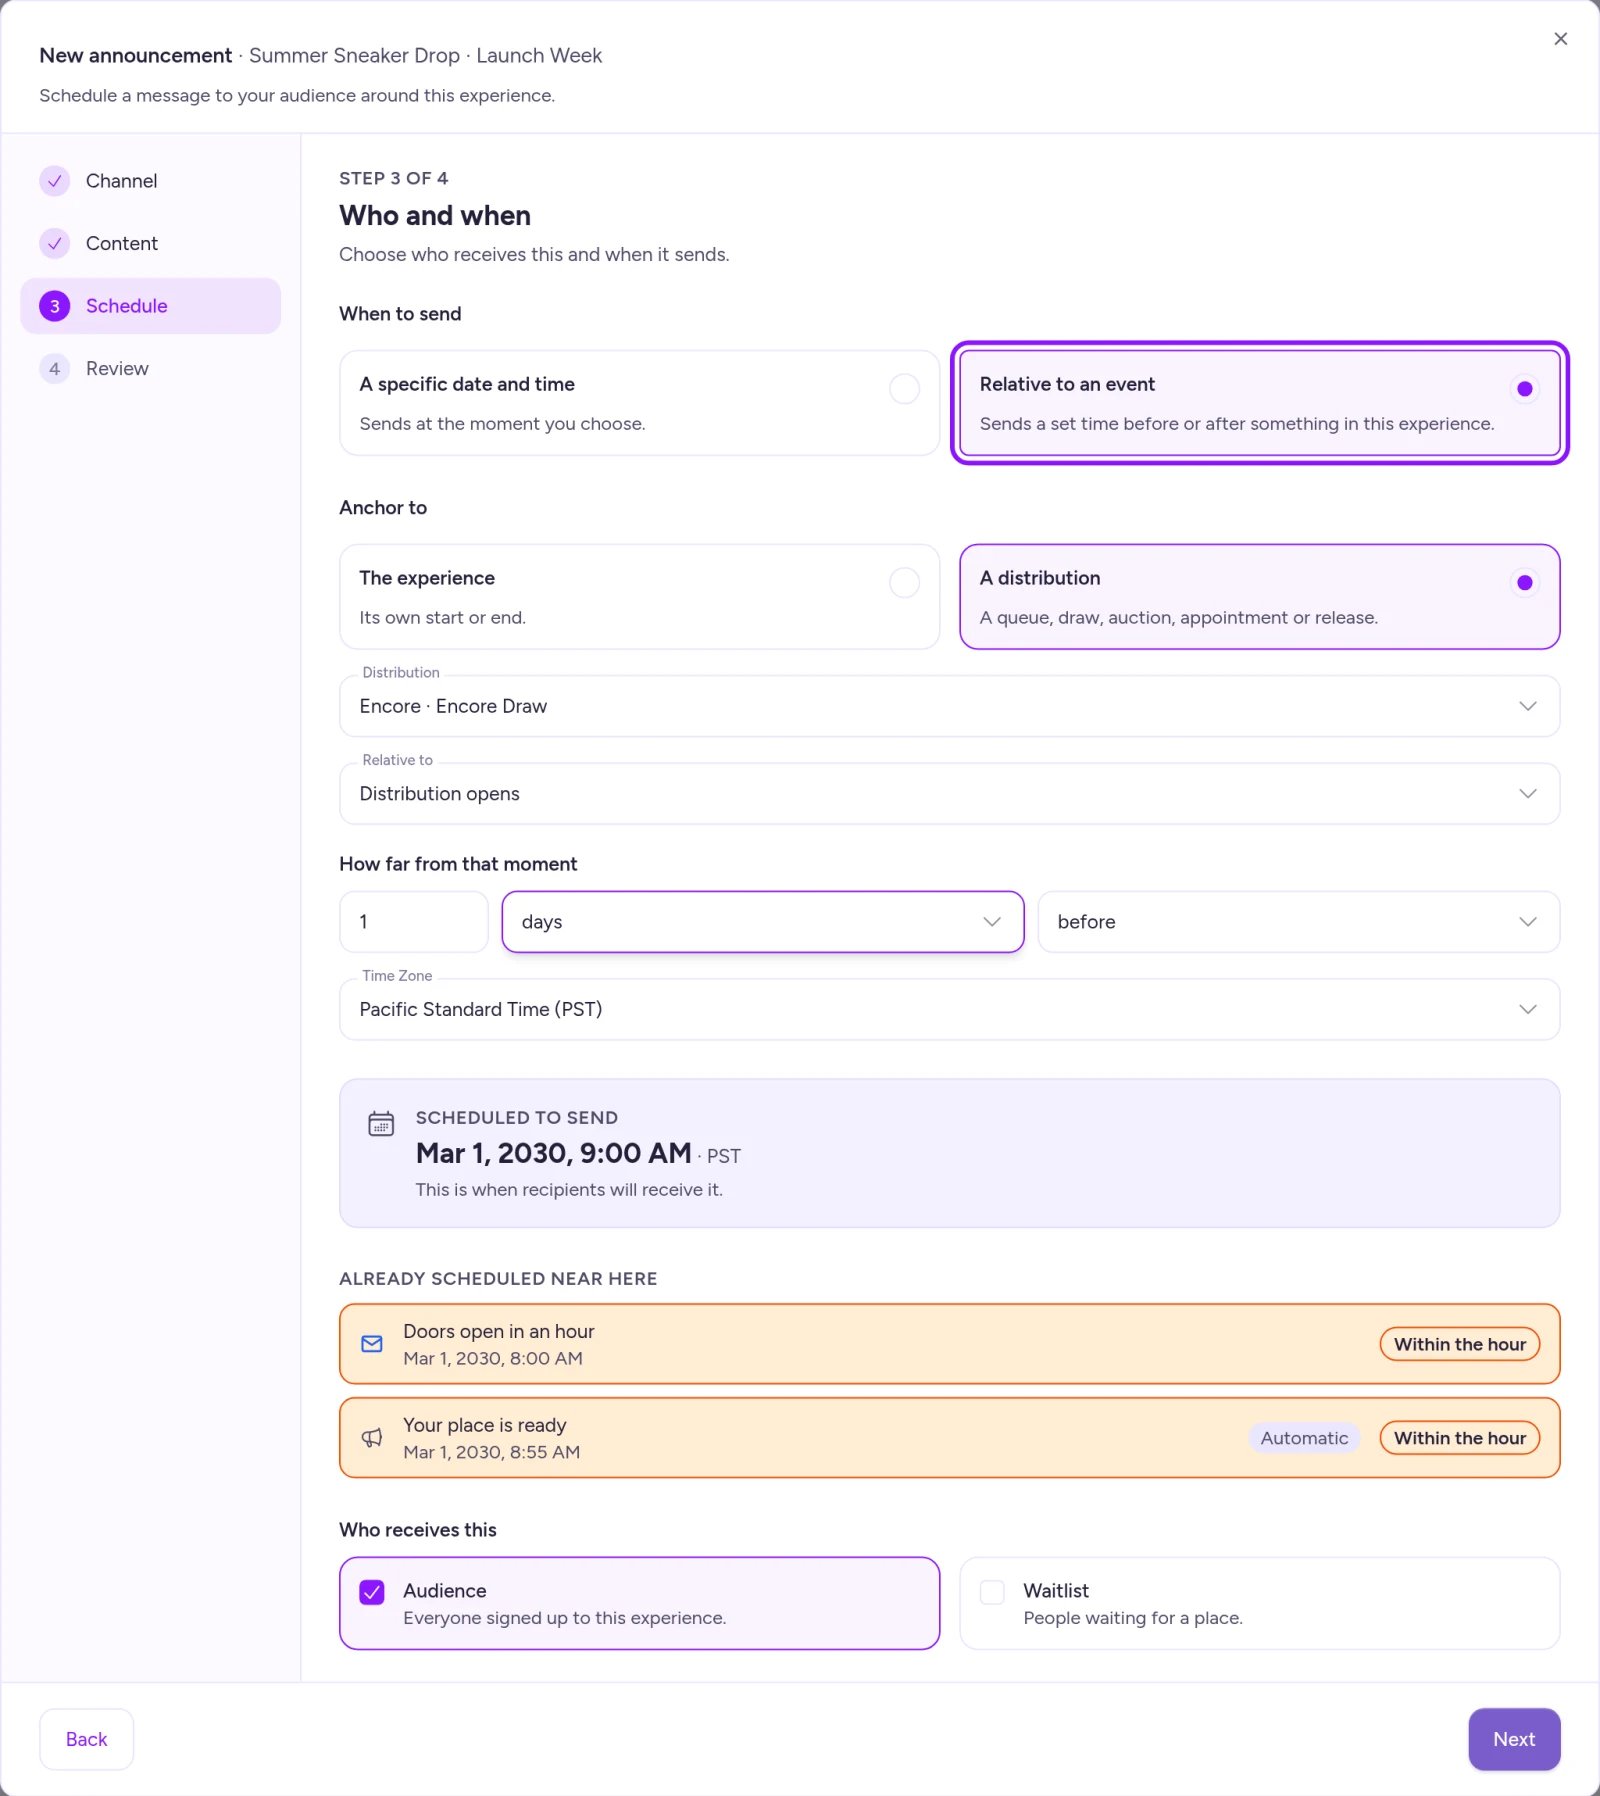
Anchor announcements to key drop moments and spot nearby sends before scheduling.
Schedule a text message
Follow the same flow as scheduling an email, with two differences:- On the Channel step, choose SMS. When Twilio is connected, the card shows your sending number and confirms that texts go only to opted-in shoppers. (If SMS is unavailable, see Troubleshooting.)
- SMS uses a single Standard layout with one Message field. Fanfare reserves characters automatically for your brand prefix (configured in your Twilio integration—see Integrations) and the required opt-out line. Keep an eye on the character counter: adding emojis or smart/curly quotes switches SMS encoding and cuts your remaining character limit by more than half.
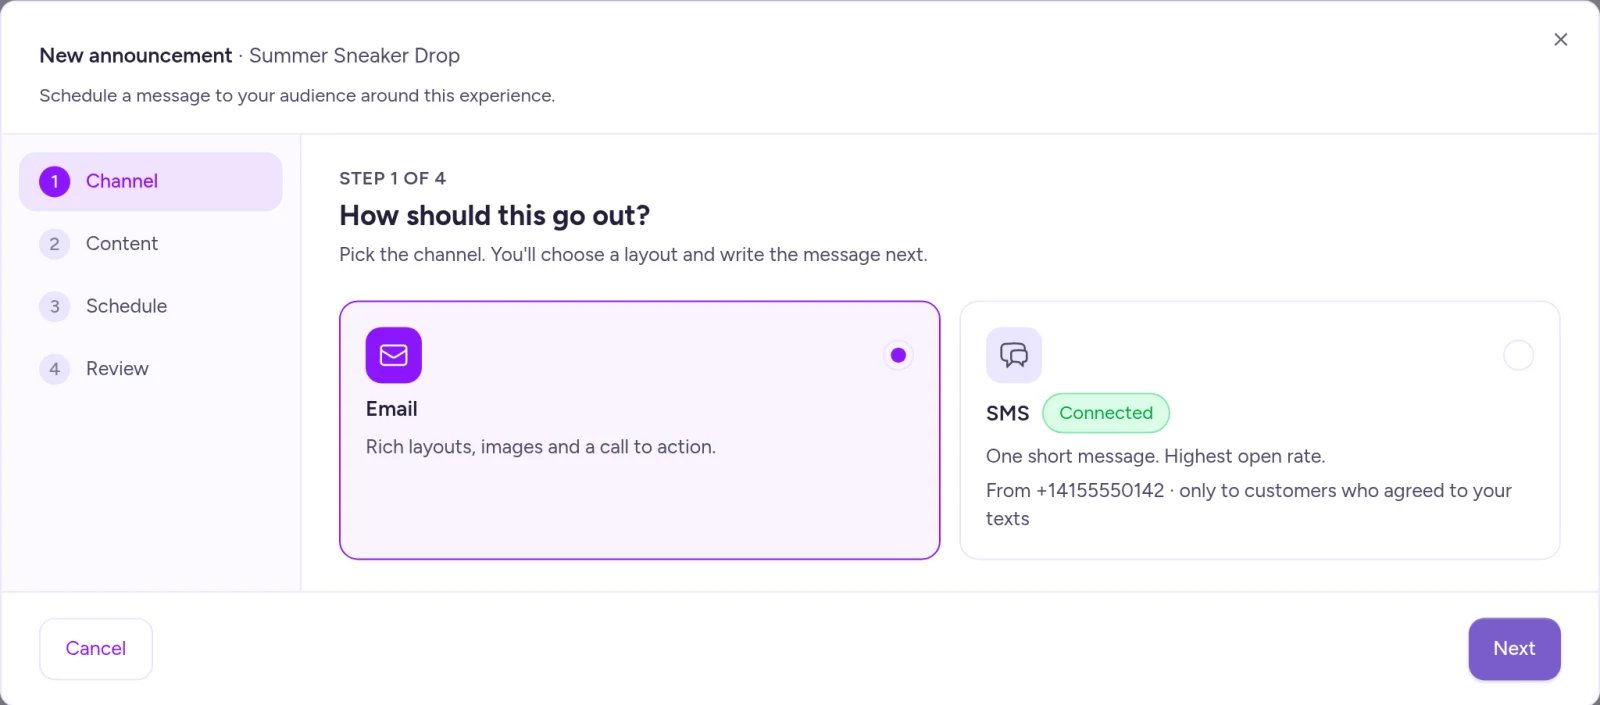
Choose Email or SMS—connected Twilio accounts display your sending number directly on the channel card.
Schedule a social post
Social posts publish directly to the followers of your connected accounts (no Fanfare audience selection required). Schedule them from the experience’s Marketing Hub or Overview page.1
Pick your channels and formats
Select Schedule, choose Social, and under Publishes to, select the connected accounts and formats you want—such as Instagram Feed post or Story, Facebook Page post, Discord Message, or Telegram Channel post. Select Next.
2
Choose a kit and moment
Select a Kit (Countdown card, Photo-led, or a custom kit from Templates and widget designs) and pick the Moment your post celebrates: Announced, Reminder, Live, Closing, or Closed.To keep stale posts from going out late, Fanfare skips any post that hasn’t published by its moment’s deadline:
Moments require the relevant experience open or close time to be set. With Fanfare’s built-in Countdown card and Photo-led kits, Reminder and Closing posts skip Instagram Feed post and Facebook Page post formats automatically. Select Next.
3
Add your hook and photo
Enter an optional Hook, upload a Photo (required for Photo-led, optional for Countdown card), and add Alt text. Select Next.
4
Schedule and review
Set A specific date and time or Relative to an event (anchored to the experience, before the moment’s deadline). Review each generated post preview carefully, then select Schedule.
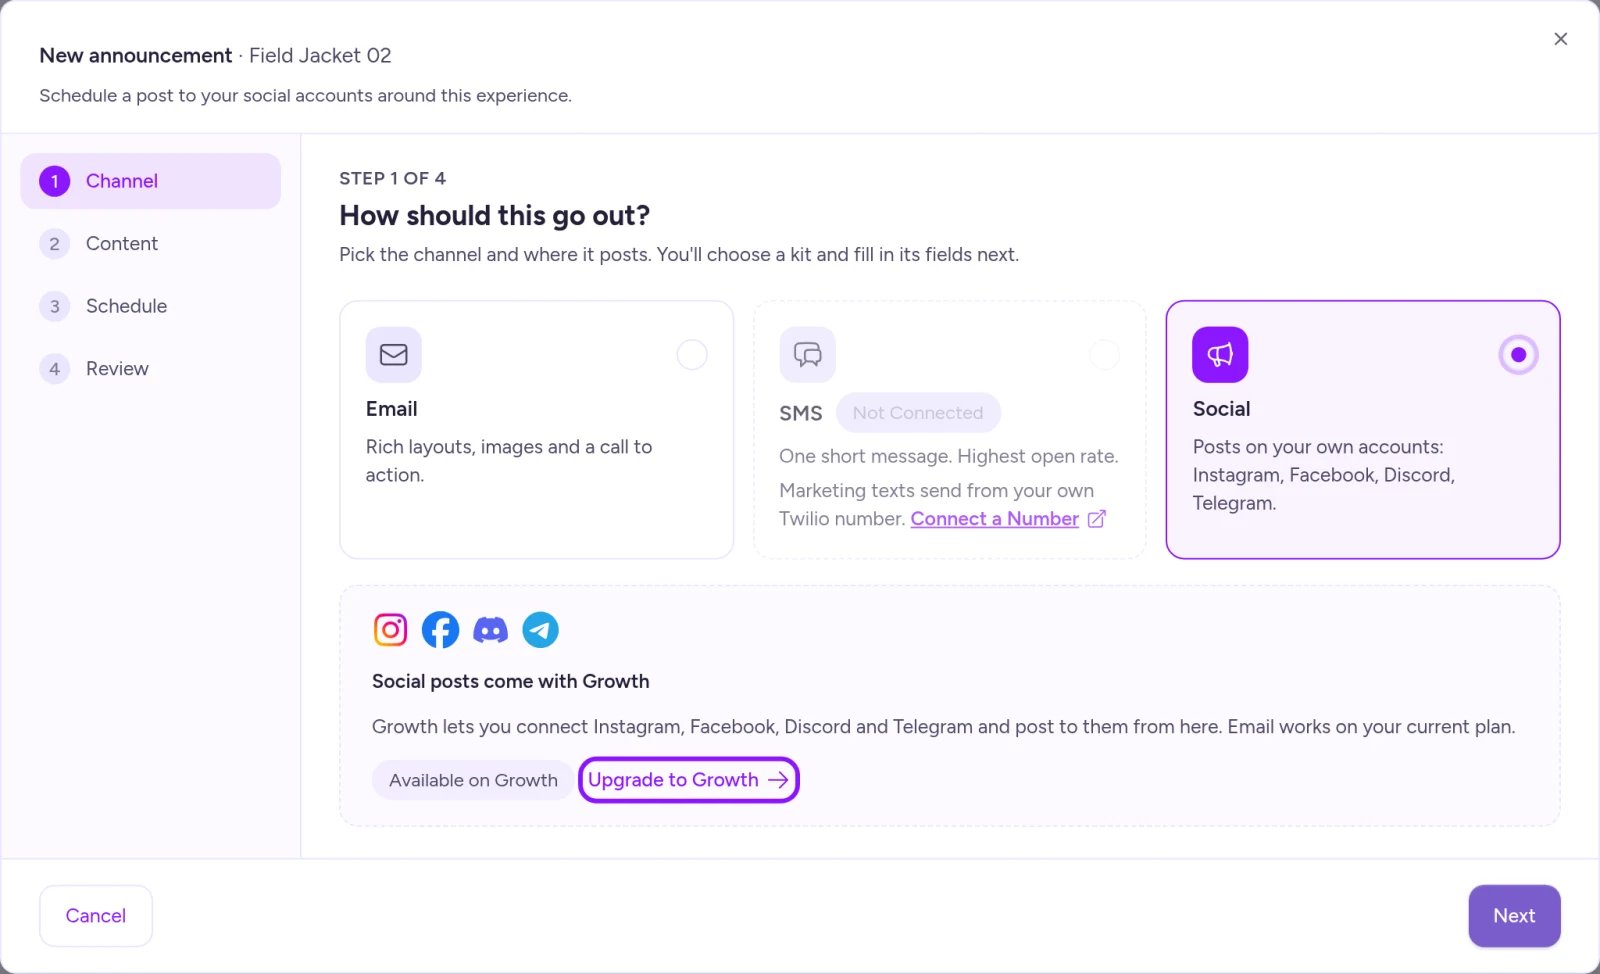
Scheduling social posts requires the Growth plan or above.
Send yourself a test
On an email’s Review step, select Send test under Send yourself a test. Fanfare sends a preview directly to your sign-in email address (shown beside Goes to), with a 30-second cooldown between test sends.Edit an announcement
Select any email or SMS row in Marketing Hub, then click Edit to jump into Review. Click any step to update it, then select Save.- Channels are fixed: To switch between email and SMS, create a new announcement.
- Switching email layouts: Shared fields like Headline and Body carry over; fields unique to the old layout are cleared.
- Social posts can’t be edited directly: Use Cancel and copy instead (see below).
Delete or cancel
- Email or SMS: Select the announcement, open the More menu, and select Delete (can’t be undone). Automatic audience invites can’t be deleted—turn them off instead under Invites, waitlist and access-code sends.
- Social post: Select the post to see its options:
- Copy to another moment: Duplicates the post for another drop moment while keeping the original scheduled.
- More → Cancel: Stops every post in the bundle (can’t be undone).
- More → Cancel and copy: Permanently cancels the original and opens an editable copy (closing without scheduling leaves the original canceled).
Things to know before you go live
- Opt-in and unsubscribe compliance: SMS reaches only customers who opted into marketing texts and haven’t opted out. Emails automatically skip customers who unsubscribed from marketing email, and anyone missing contact info for a channel is skipped. See What your customers see.
- Keep social accounts connected: Disconnecting a social account stops its scheduled posts from publishing. See Integrations.
On Shopify
Two details differ in the Fanfare app on Shopify:- Test emails: Send test delivers to your Shopify staff account’s email address—which must be verified in Shopify first.
- Connecting social accounts: Authorizing Meta or Discord opens their consent flow in the full browser window before returning you to the Shopify admin. See Integrations.
Troubleshooting
An announcement shows Didn't send
An announcement shows Didn't send
Check the reason printed on the row, resolve it, then open the announcement, pick a new future send time, and save—scheduled announcements don’t automatically retry after a failure.
- Missing postal address: Add your business postal address under Settings → Email Sender.
- Twilio needs attention: Reconnect your Twilio number under Settings → Integrations.
I can't select SMS
I can't select SMS
SMS requires an active Twilio number in Settings → Integrations. If Twilio is disconnected and the card notes that texts won’t send until reconnected, you can still draft and schedule—just reconnect Twilio before the send time so the message doesn’t fail.
Fanfare says the send time has already passed
Fanfare says the send time has already passed
To send as soon as possible, pick a specific time a few minutes in the future.
Related
Invites, waitlist and access-code sends
Manage automatic audience invites, waitlist alerts, and access-code blasts.
Sender identity and sending domain
Set your postal address, sender name, and custom sending domains.
Integrations
Connect Twilio for SMS and Instagram, Facebook, Discord, or Telegram for social.
What your customers see
See every notification and screen customers encounter during a drop.
Performance
Track email delivery, engagement, and drop conversion after launch.