

Before you start
- Have at least one product ready in Fanfare. See Add products.
- To use Pre-authorise on joining, you need Fanfare checkout and a connected Stripe account. See Payments and fees.
- To use Bias toward loyal consumers, turn on your loyalty program first (Pro and above). See Run a loyalty program.
Create a queue with a new experience
The experience wizard builds your experience, its first sequence, and the queue in one flow. Shared steps—products, naming, schedule defaults, Stock, and Review & launch—are covered in Create an experience. Here’s what’s specific to a queue:1
Choose Queue
Open Experiences, select Create Experience, and choose Queue.
2
Set your schedule and stock
Complete Configure Experience and Stock. Opens At defaults to the next minute—adjust it if you aren’t ready to launch right away, because keeping it opens the queue immediately and locks Payment collection as soon as you finish.
3
Configure queue pacing
On Queue Configuration, under Flow Control, set your Admit rate (how many shoppers enter per minute). Check the Throughput estimate below it to see your hourly pace, then optionally turn on Bias toward loyal consumers or Automatic entry.
4
Choose how customers pay
On Payment, choose Pay when admitted or Pre-authorise on joining under Payment collection. Review Payment collection before deciding.
5
Set guest access and launch
On Access, select Anyone, as a guest under Open to everyone if you want shoppers to join without signing in. Review your setup on Review & launch, then select Create experience.
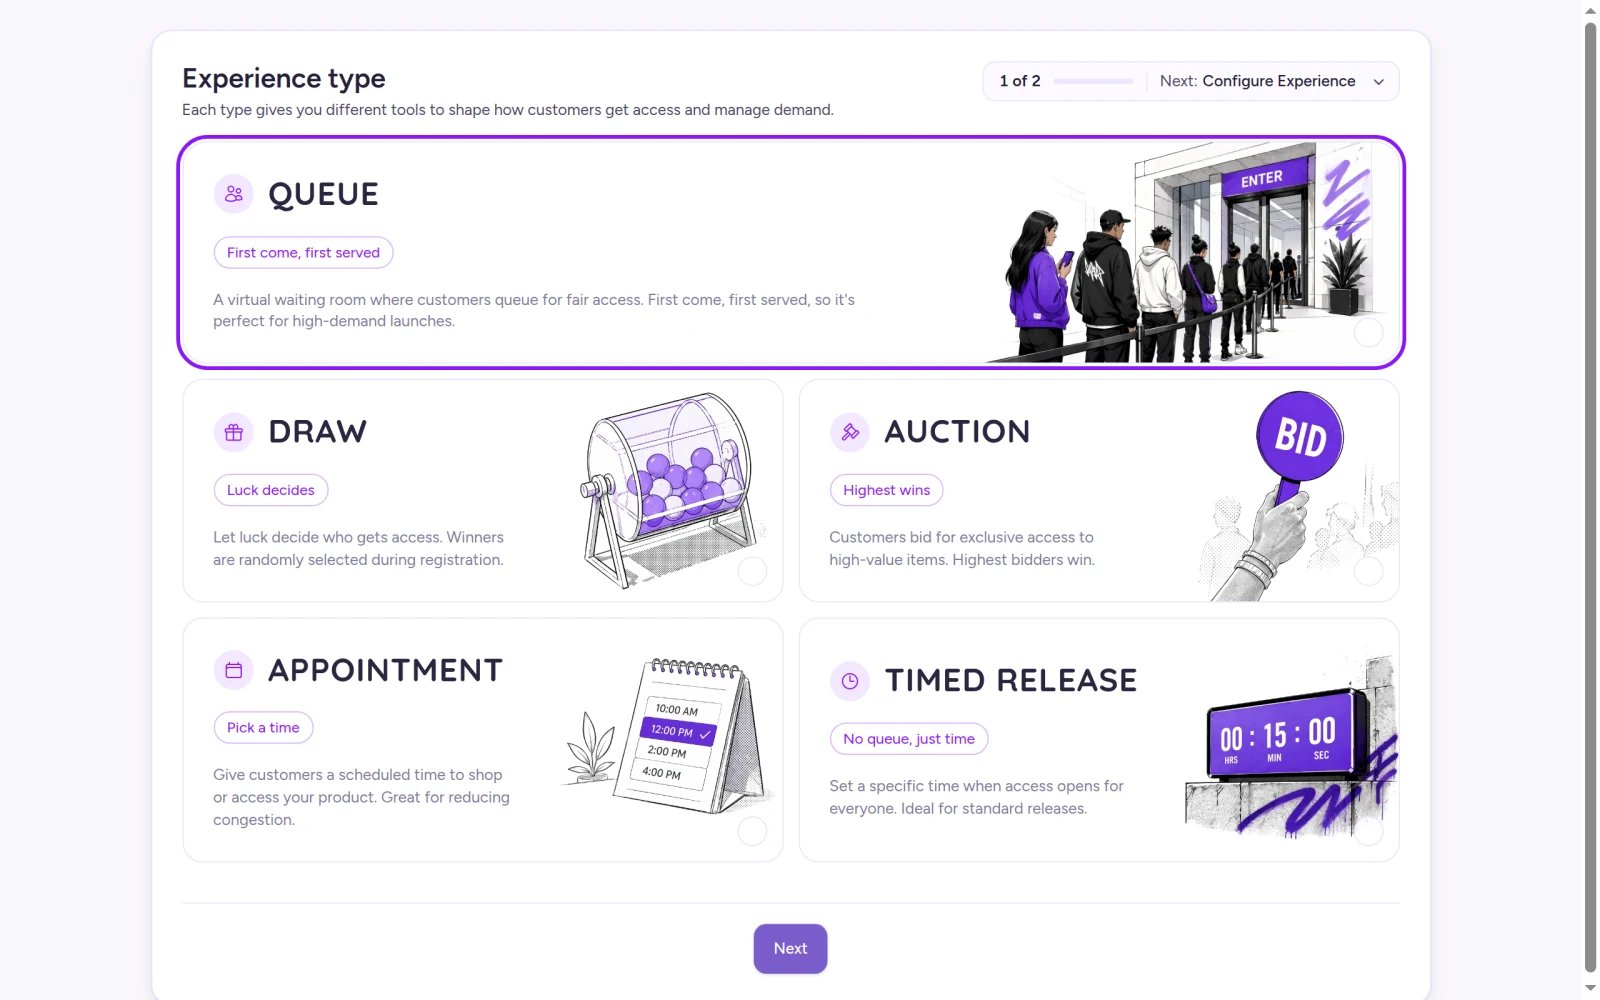
Select Queue to start a paced, first-in-line release.
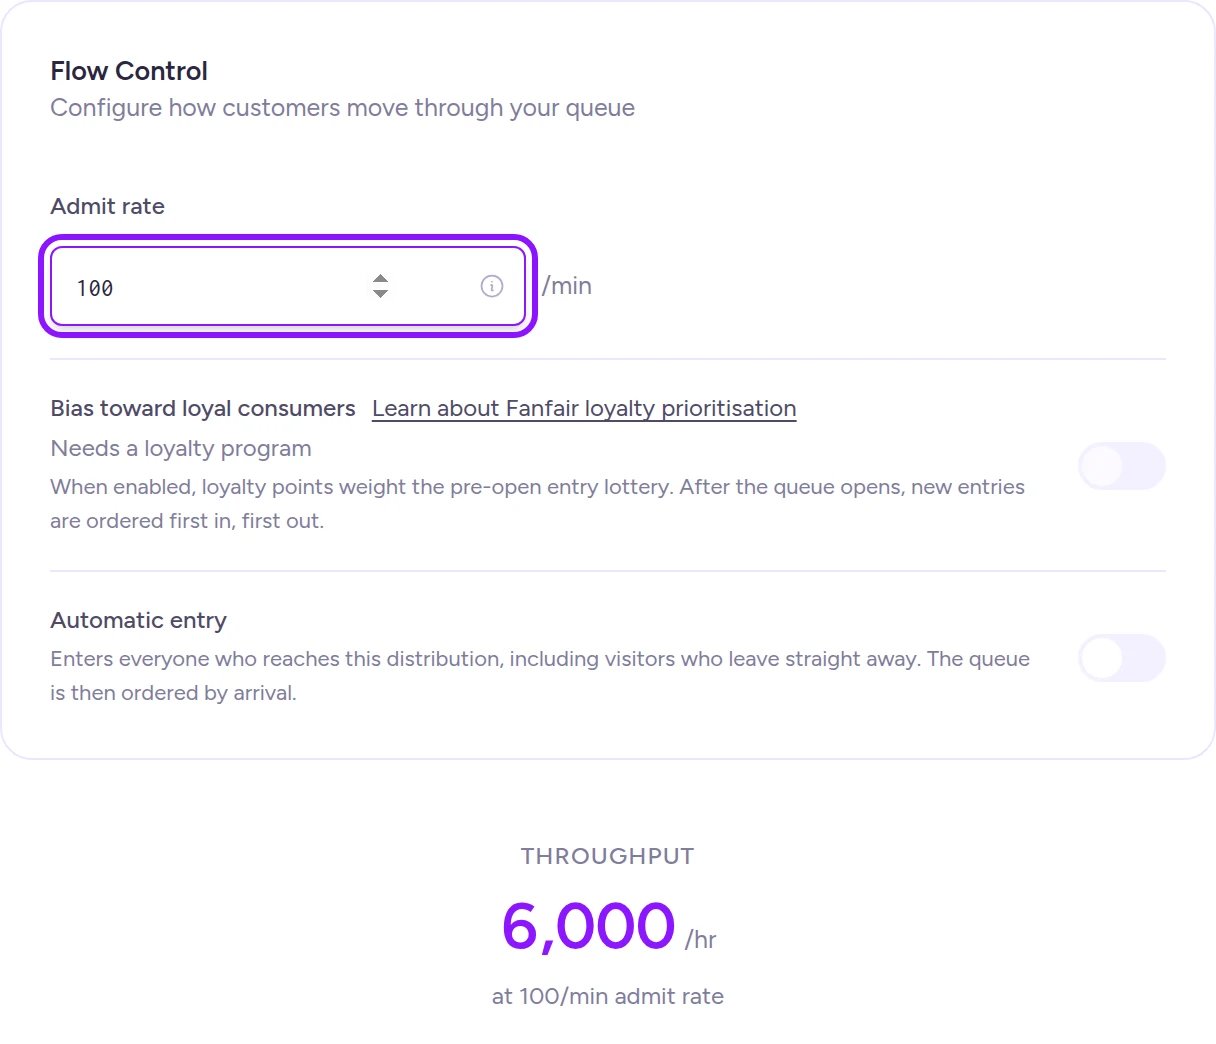
Set your admit rate and check the hourly throughput before continuing.
Add a queue to an existing sequence
Use this when you want to add another release window—like a second wave later in the day—to an experience you’ve already created.- Open your experience, then select the sequence you want to add to.
- On the Overview tab, select Add distribution in the Distributions card (or Create Distribution at the top of the page).
- Enter a Name, select Queue, and click Next.
- Set Opens, Closes, and Time zone (defaults to the experience’s time zone), then select Next.
- On Configure, set Admit rate and toggle Bias toward loyal consumers, Allow guest access, or Automatic entry as needed, then select Next.
- On Payment, choose your Payment collection option and select Next.
- Review your settings and select Create Distribution.
Schedule rules: Opening times can’t be in the past, and distributions in the same sequence can’t overlap—if they do, Schedule conflict flags the overlapping window before you can continue. Before Opens, shoppers see a countdown (or whichever earlier distribution is currently active). To run two distributions at the same time, place the second one in a new sequence—keeping in mind that sequence routing priority follows creation order and can’t be reordered in the admin. See Distributions and Sequences and routing.
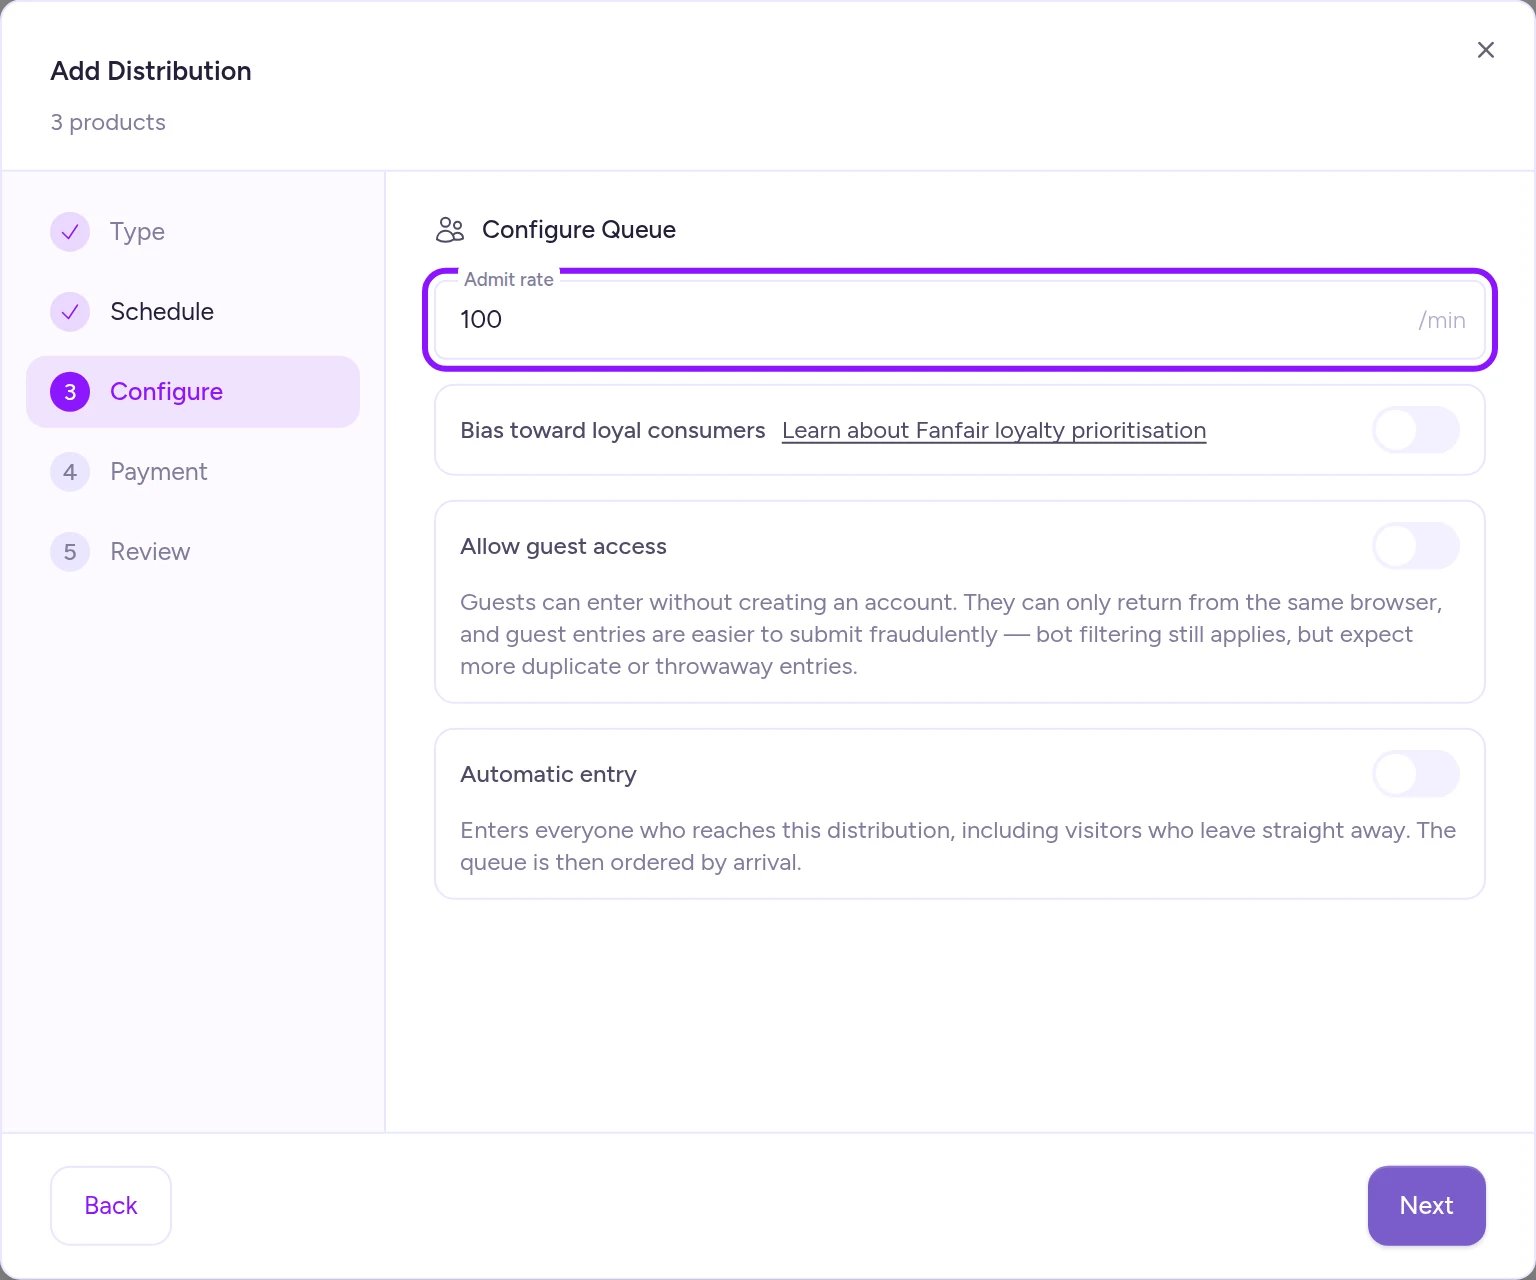
When adding a queue to an existing sequence, guest access appears as a toggle on the Configure step.
Queue settings
A few details worth knowing as you configure your queue:
- Admit rate floor: The wizard requires an admit rate of at least
1. Add distribution and Edit accept0, but an admit rate of0lets nobody in—use Pause queue if you need to pause admissions during a live drop. - Loyalty bias: Requires your loyalty program to be active—otherwise the toggle stays disabled. See Loyalty and Fanfair for how points affect queue order.
- Guest access trade-offs: Guests can only return to their spot from the same browser, and open guest access tends to attract more duplicate or throwaway entries than email sign-in. See Customers and identity and Sequences and routing.
- Payment window and line size: Every admitted shopper gets a fixed 30-minute payment window (not configurable for queues), and the admin has no setting to cap queue length. See Admission and the payment window.
Payment collection
- Pay when admitted: Shoppers complete checkout within their 30-minute payment window after being admitted.
- Pre-authorise on joining: Fanfare places a hold for the Authorization amount (in your organization’s currency) when a shopper joins. The hold is captured automatically if they’re admitted and released if they aren’t. The authorization amount must exactly match the product’s price, and because card holds expire after about 7 days, keep your queue window well under a week. See Admission and the payment window.
Pre-authorise on joining isn’t available when shoppers in the sequence still have to choose between multiple products or variants. To pre-authorize a multi-option drop, run it as a draw or limit the sequence to a single product and variant.
Edit a queue
To update a scheduled or live queue, open the sequence’s Overview tab, select Edit on the queue card, adjust Schedule, Configuration, or Payment, and select Save.- Live edits apply immediately: While a queue is live, Save takes effect right away with no confirmation prompt. See Change things mid-drop.
- Opening-time lock: Starting about 5.5 minutes before Opens, the open time can only move earlier—you can still adjust Closes until the queue ends.
- Closed or deactivated queues: Once a queue closes, it can’t be edited (including its Name)—create a new queue instead. Deactivated queues become read-only (View replaces Edit). See Stop a drop.
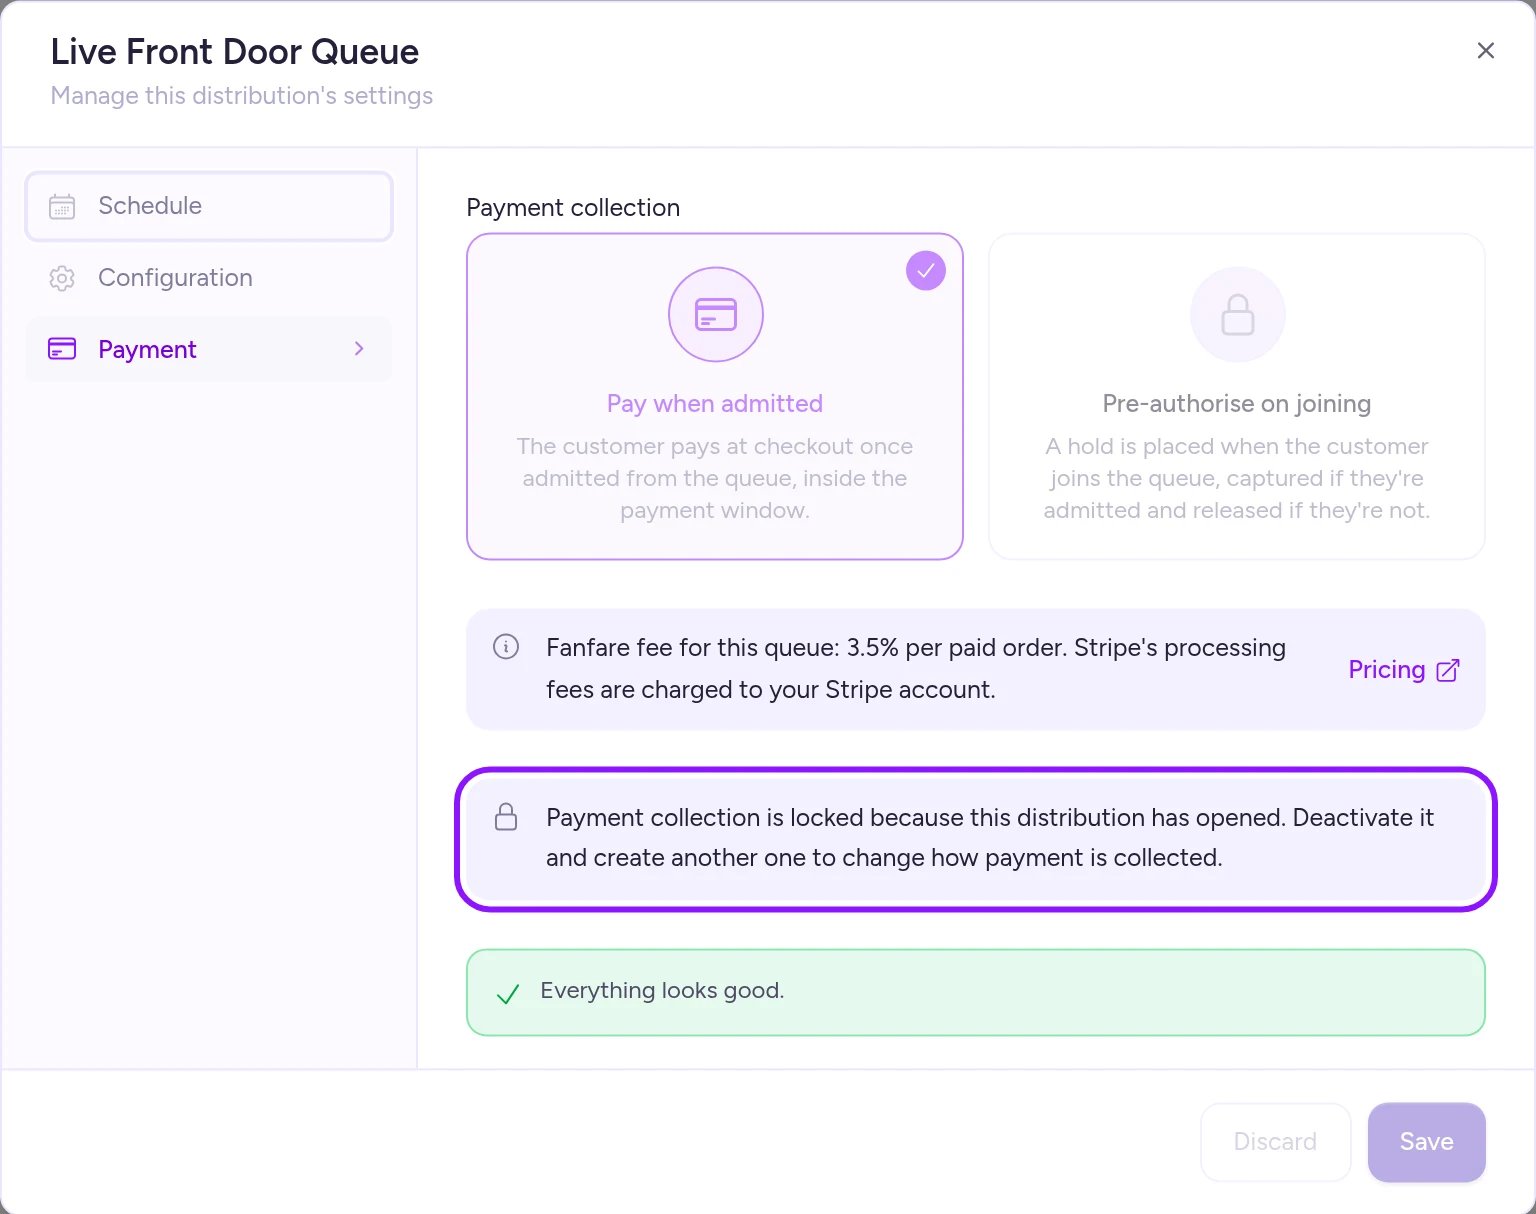
Payment collection locks shortly before the queue opens and can't be changed afterward.
What customers see
For how line order works under the hood, see Queue. For a walkthrough of every screen shoppers see from countdown to checkout, see What your customers see.On Shopify
Queues work the same way in the Shopify app, with one difference: shoppers pay in Shopify’s checkout, so Pre-authorise on joining isn’t available. Make sure checkout protection is enabled and the Fanfare product widget is published on your theme before doors open—otherwise shoppers can bypass the queue. See Storefront setup.Troubleshooting
I can't continue past the Schedule step
I can't continue past the Schedule step
Your queue overlaps another distribution in the same sequence, flagged under Schedule conflict. Adjust the dates so the queue starts after the other distribution ends (back-to-back windows are fine), or add the queue to a separate sequence.
Bias toward loyal consumers is grayed out
Bias toward loyal consumers is grayed out
Your loyalty program is turned off. Enable it under Loyalty (available on Pro and above), then return to your queue settings.
I can't change Payment collection
I can't change Payment collection
Payment collection locks about 5.5 minutes before the queue opens. Deactivate the queue and create a new one with the payment method you want.
Related
Queue
How queues work and when to choose one.
Allocate stock to a drop
Control how many units a queue can sell.
Change things mid-drop
Pause a queue or adjust pacing while it’s live.
What your customers see
Every stage of the queue from the shopper’s side.
Watch a live drop
What each metric on the live queue card means.
Stop a drop
Deactivate or delete a queue.