

Before you start
- Your experience must still be active. Once every distribution in an experience is deactivated, Add sequence is hidden—create a new experience instead.
- Creating audiences requires Growth or above (see Build audiences). Sequences, access codes, order limits, and attaching an existing audience are included on every plan.
Create a sequence
- Open your experience, find the Sequences card on Overview, and select Add sequence.
- Enter a Name and choose a Sequence Color (one is preselected for you).
- If your experience has two or more products, choose a Product Selection mode:
- Customer Picks (default): Shoppers choose which product to buy.
- Mystery Box: Fanfare randomly assigns a product using your Allocation Percentages (or select Distribute evenly). Give every product more than
0%—leaving any product at0%still creates the sequence, but skips saving the Mystery Box weights until you set them in Product selection and Mystery Box.
- Optionally, under Access Restrictions (optional), pick an Audience and/or enter an Access Code (up to 32 characters, or select the generate icon). Selecting an audience here keeps guest entry off for distributions you add and schedules an invite email once you add the first distribution—see Choose who can enter.
- Select Create.
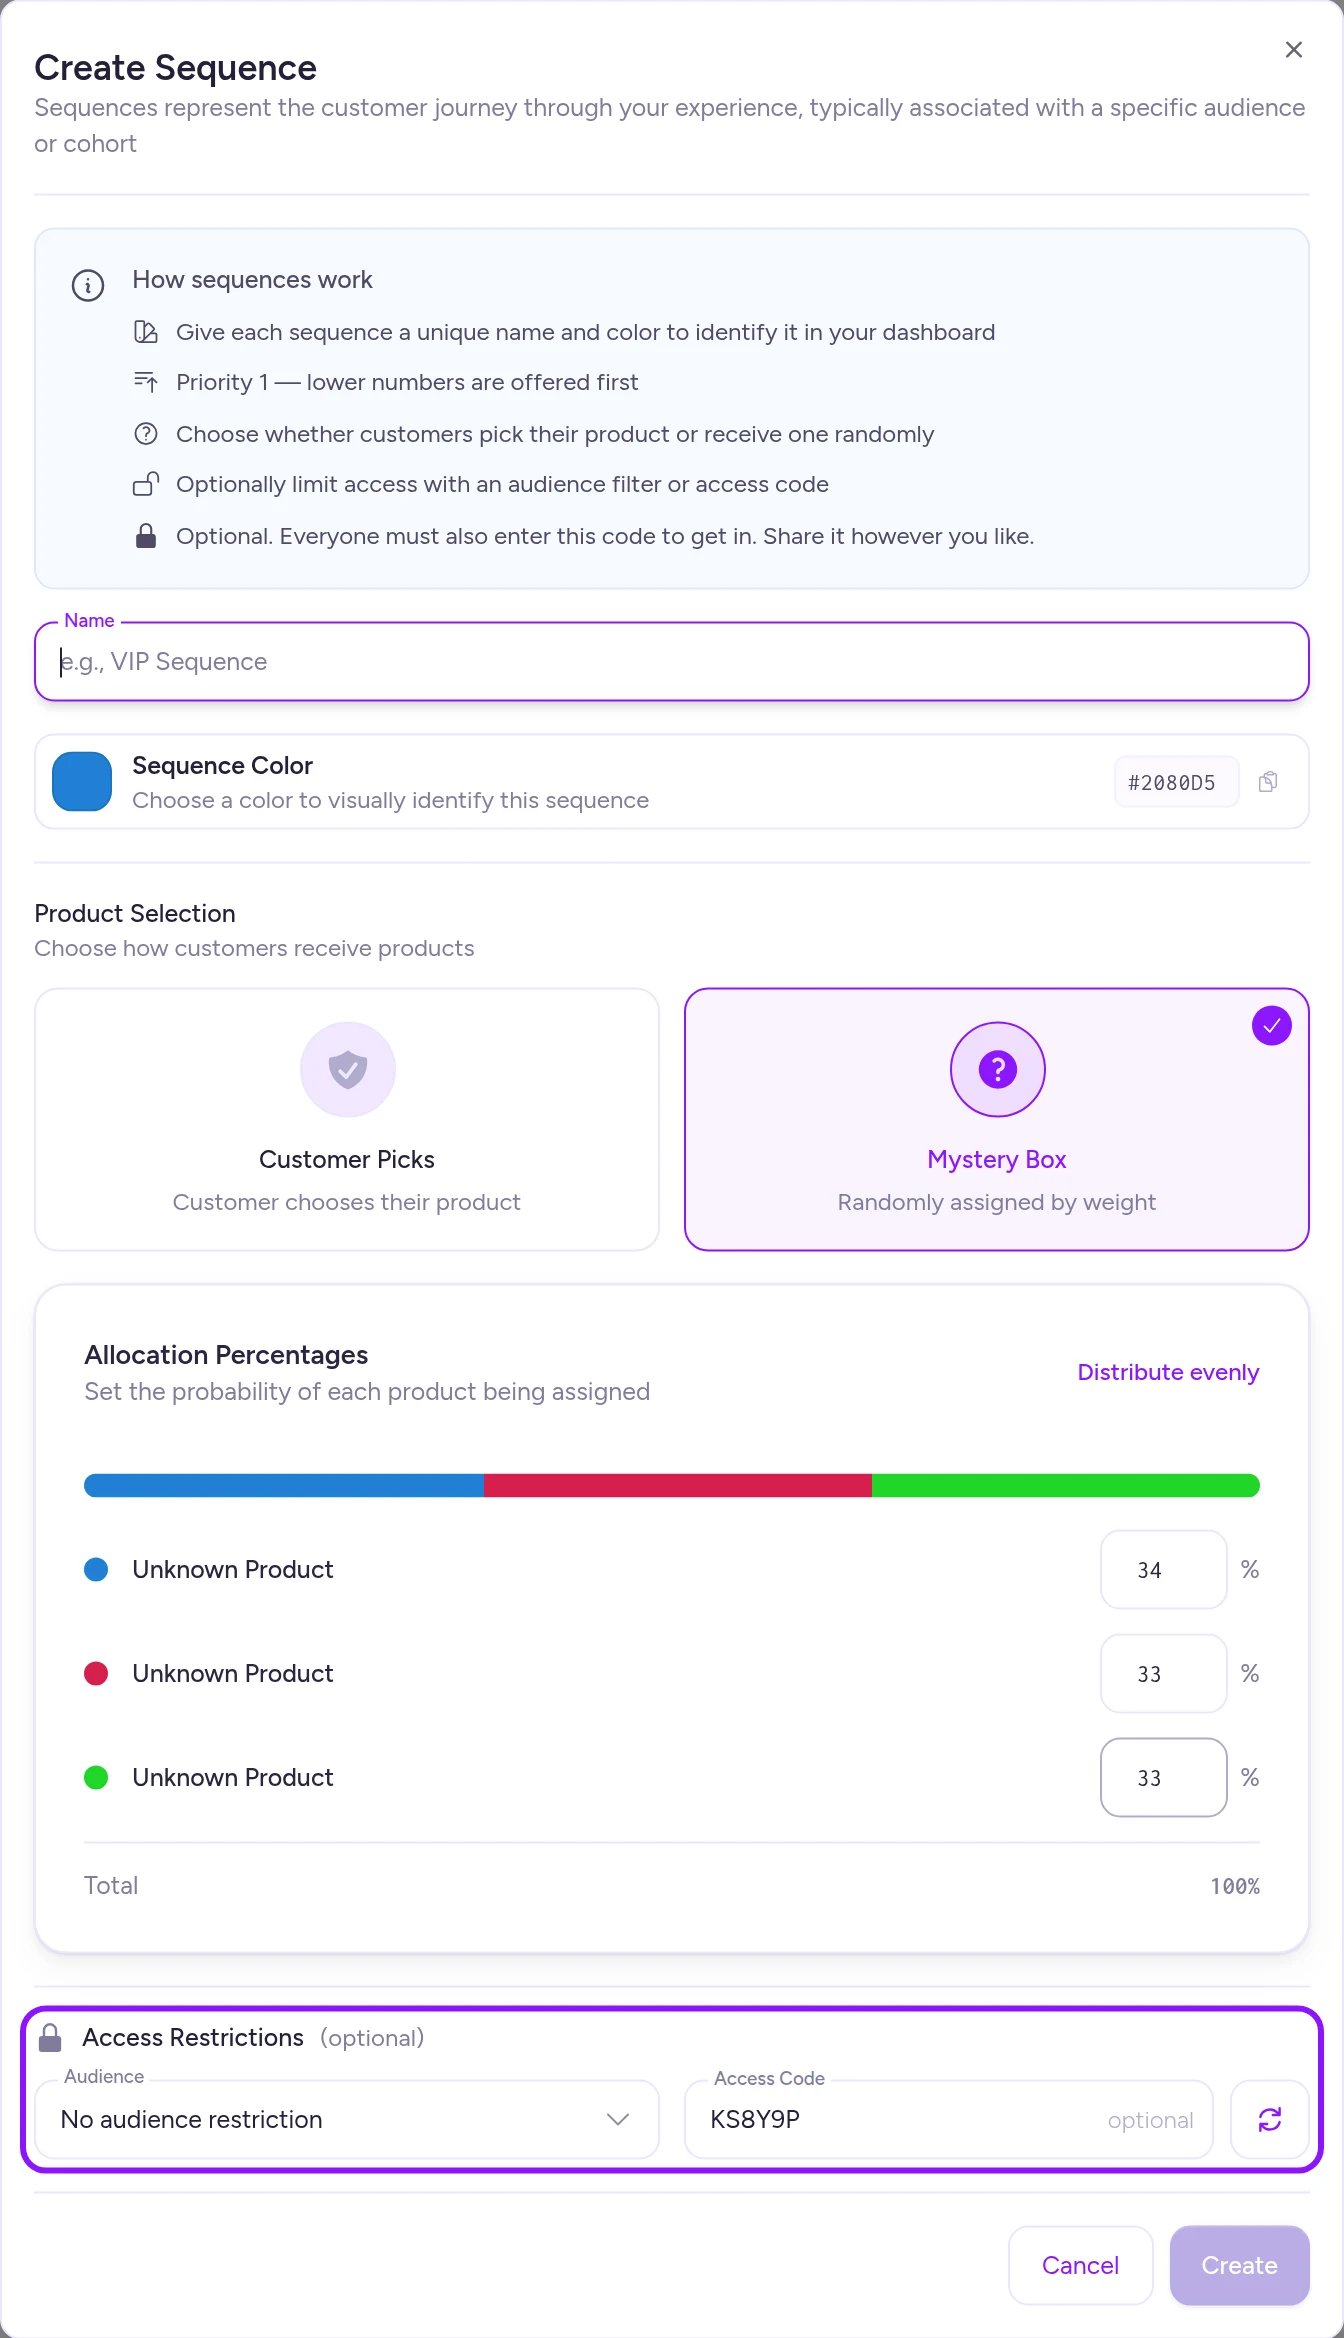
Mystery Box and its allocation percentages appear only when an experience has two or more products.
Add a distribution to the sequence
A sequence needs at least one distribution—a queue, draw, auction, timed release, or appointment—before customers can enter.- Open Add Distribution from any of these spots:
- Add distribution on the Draft sequence row in the Sequences card
- Create Distribution at the top of the sequence page (or in the row menu on Sequences)
- The dashed Add distribution row in the sequence’s Distributions panel
- Duplicate in an existing distribution’s menu (copies type and settings with a blank schedule)
- Complete Type, Schedule, Configure, Payment (queues and draws only), and Review.
- Select Create Distribution.
Distributions within the same sequence can’t overlap—back-to-back windows are fine, and Fanfare flags any Schedule conflict before you can continue. To run two distributions at the same time, put them in separate sequences.
Choose who can enter
Open the sequence and go to the Access tab. The Who can enter card summarizes your Audience, Sign-in status (with quick links to each queue, draw, and timed release where guest entry is configured), and Shared access code. To update access gates:- Select Edit access.
- To gate by audience, select Choose audience and pick one—or use Change or Remove to update an existing selection.
- To require a code, switch on Shared access code. Fanfare auto-generates a code if the box is empty, or you can enter your own (up to 32 characters) or select Generate.
- Select Save.
- Access codes aren’t case-sensitive.
- If you set both an audience and an access code, shoppers must satisfy both.
- Changing an access code doesn’t remove shoppers who already passed the gate with the old code.
- To remove a code completely, select Clear code on the Shared access code row and confirm.
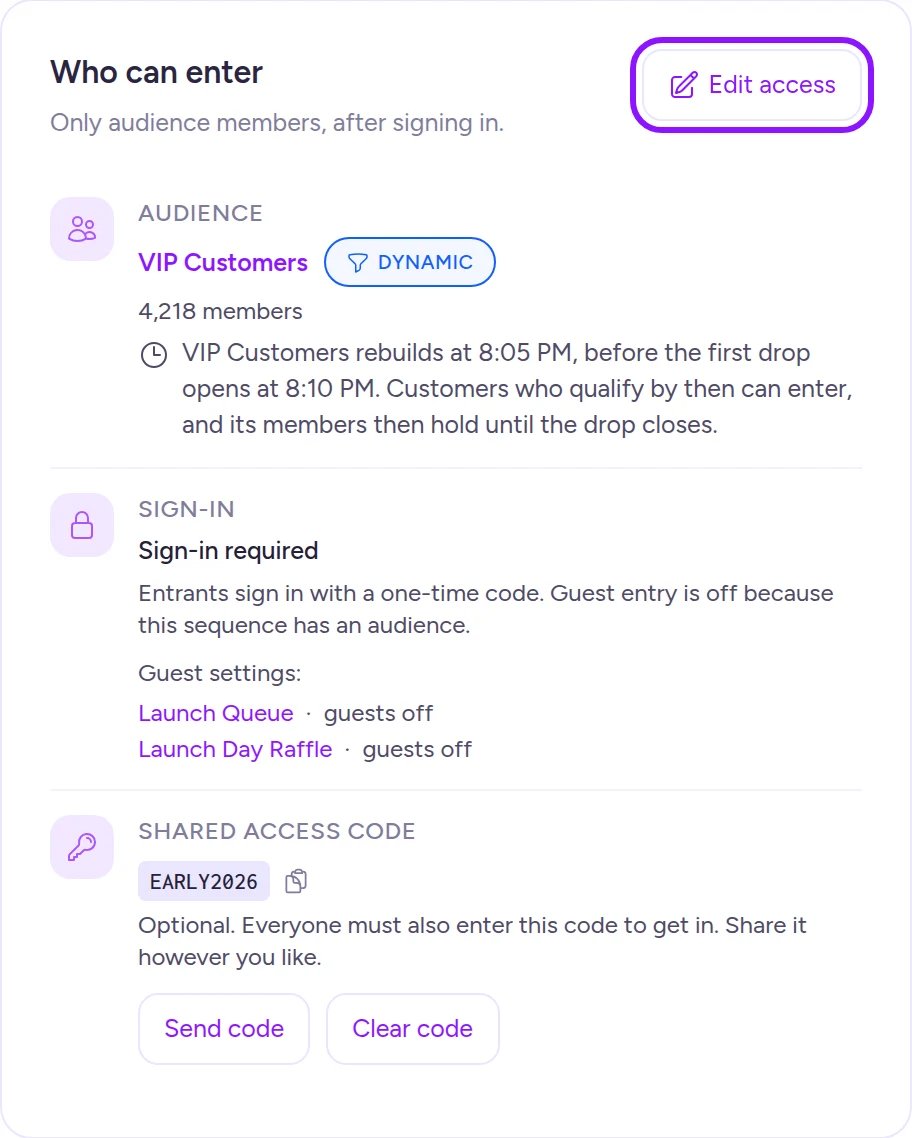
The Who can enter card summarizes the audience, sign-in requirement, and shared access code for a sequence.
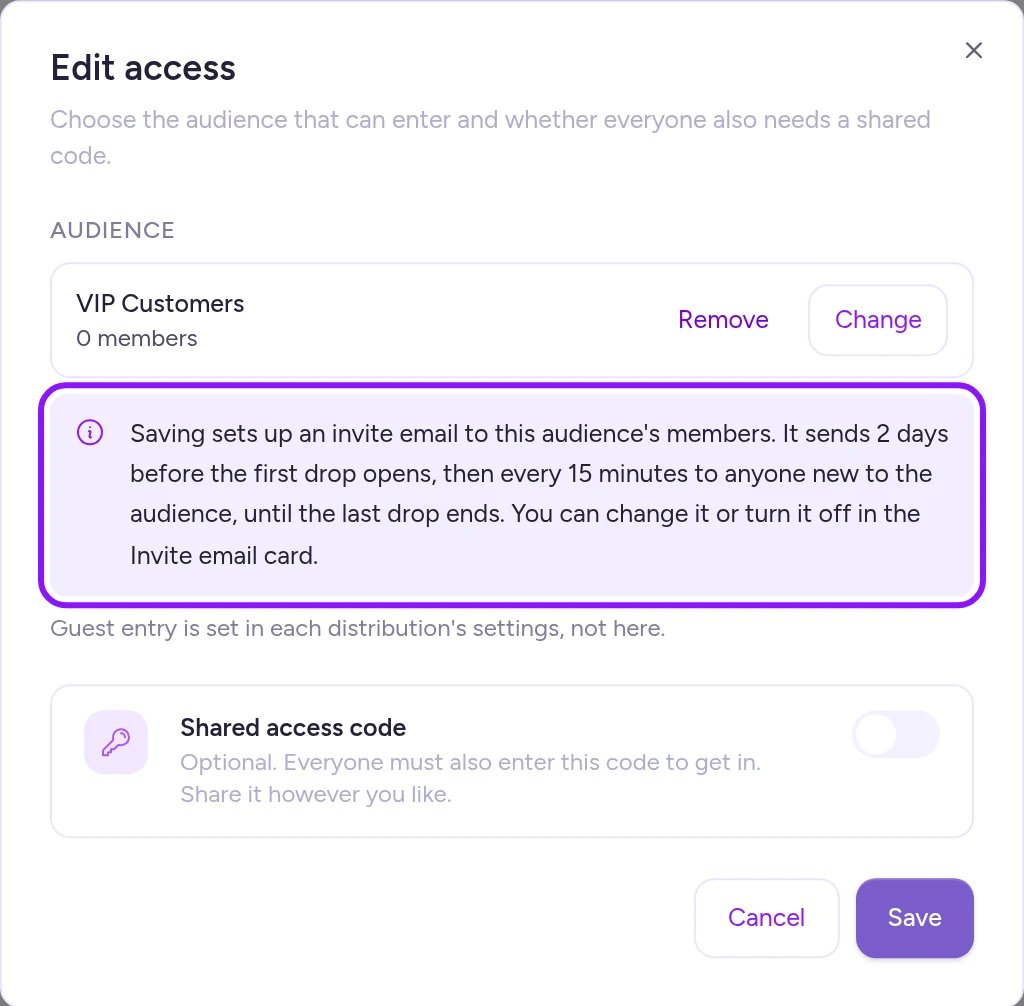
Review the invite email notice before saving an audience gate.
Product selection and Mystery Box
Product selection applies when an experience has two or more products and the sequence isn’t appointment-only. (For multi-product draws created in the experience wizard, the Product assignment step configures this same setting.)- On the sequence page, select Edit to open Settings.
- Under Product Selection, choose Customer Picks or Mystery Box.
- For Mystery Box, configure Mystery Box Products:
- Select Add Products to choose products for the pool.
- Enter a weight from
1to1,000on each row (higher weights mean higher odds, shown live as a percentage badge). - Select Save Weights.
- Select Save at the bottom of the dialog to save the selection mode.
Adding or removing Mystery Box products—and selecting Save Weights—saves immediately, independently of the dialog’s Save or Discard buttons. Make sure you pick only products included in this experience; the picker displays your full catalog, and products outside the experience can’t be assigned.
- Automatic rebalancing: When a product sells out, it’s dropped from the pool and its share redistributes across remaining products.
- Product-level assignment: Mystery Box assigns the product, not the size—size selection happens afterward for multi-size products.
- Not supported with timed releases: You can’t combine Mystery Box with a timed release.
- Odds vs. draw winners: Weights decide which product a shopper receives, not who wins a draw. Sequence stock limits are configured separately—see Allocate stock to a drop.
Order limits
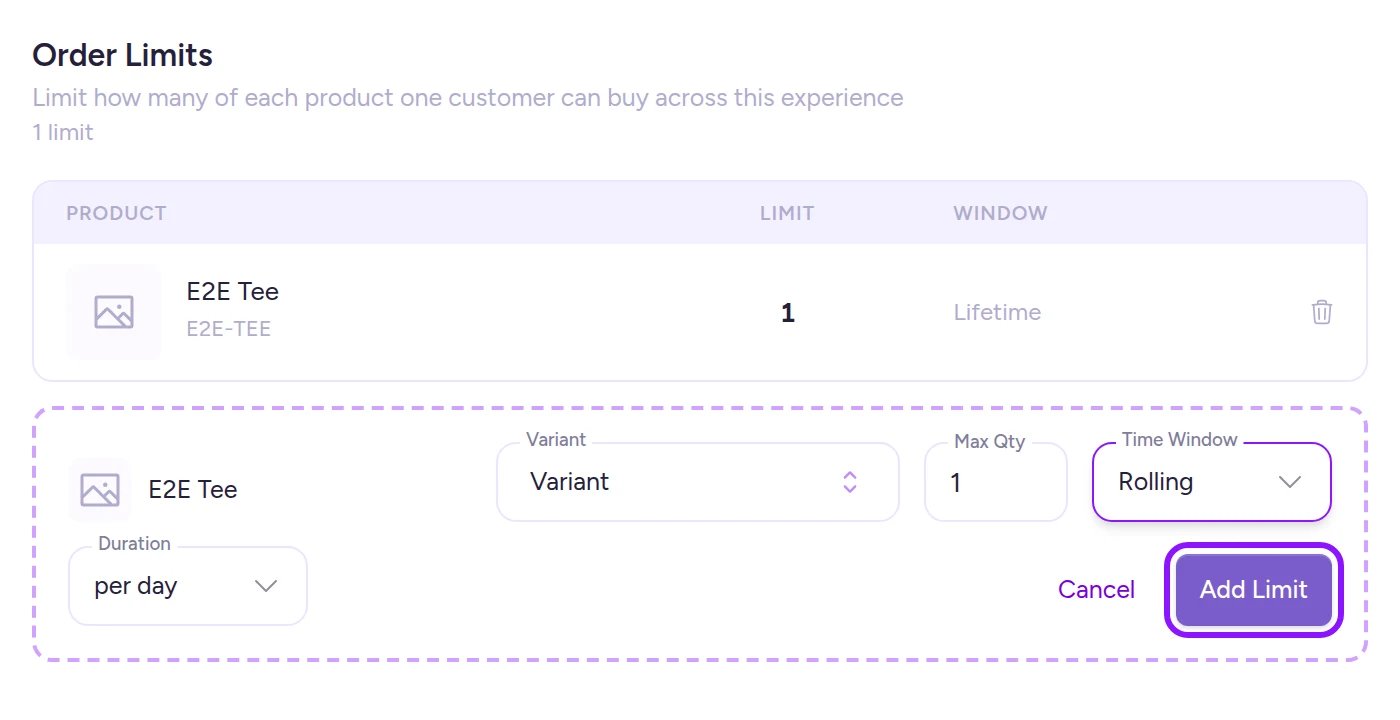
Cap how many units one customer can purchase:- On the sequence page, select Edit → Order limits.
- Select Add First Limit (or Add Limit).
- Configure the rule:
- Product (shown when the experience has 2+ products)
- Variant (optional, to limit a single size or option)
- Max Qty (maximum units per customer)
- Time Window: Lifetime, Rolling, or Calendar
- Duration (for Rolling and Calendar): per day, per week, or per month
- Select Add Limit.
- Experience-wide counting: Even though you set a limit on a sequence, it counts a customer’s purchases across the entire experience.
- Window behavior: Rolling looks back 24 hours, 7 days, or 30 days. Calendar resets at midnight in your organization’s time zone (weeks start on Sunday; months start on the 1st).
- External checkout: If customers pay in your own store checkout rather than Fanfare’s or Shopify’s, Fanfare can’t enforce order limits—enforce them in your store instead.
Rename or recolor a sequence
Click the sequence’s name at the top of its page to rename it inline, or open Edit → Settings to change Name or Sequence Color and select Save. To deactivate or delete a sequence, see Stop a drop. To pause a live queue, see Change things mid-drop.Settings at a glance
On Shopify
In the Shopify app, Appointment isn’t available under Add Distribution. Everything else on this page works the same.Troubleshooting
Create is disabled when adding a sequence
Create is disabled when adding a sequence
Make sure you’ve entered a Name and selected a Sequence Color.
I see a Schedule conflict error
I see a Schedule conflict error
Your chosen window overlaps another distribution in the same sequence. Adjust the times so the windows don’t overlap (back-to-back windows are fine), or add the new distribution to a separate sequence.
I can't change Product Selection or Mystery Box settings
I can't change Product Selection or Mystery Box settings
A distribution in the sequence is already counting stock, open, has entrants, or still has active checkouts. Wait until all distributions finish, or launch a new drop.
The audience invite email isn't sending
The audience invite email isn't sending
Fanfare requires a business postal address before sending marketing emails. Add yours under Settings → Email Sender—see Sender identity and sending domain.
Related
Sequences and routing
How Fanfare chooses a sequence for each customer and how access gates combine.
Invites, waitlist and access-code sends
Manage audience invite emails, waitlists, and access-code blasts.
Allocate stock to a drop
Set sequence inventory per size and move units between sequences.
Build audiences
Create the customer audiences you use to gate sequences.